
-------------------------------------------------------------------------------
-------------------------------------------------------------------------------
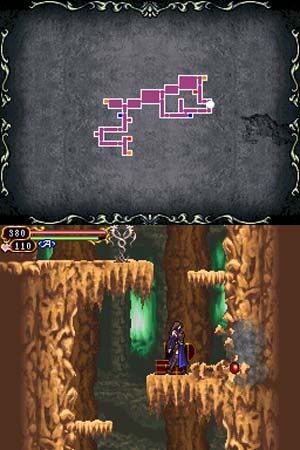
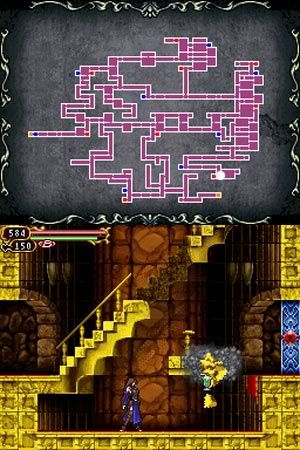
#= Tymeo Mountain
~Before the next destination, lets back to this place for some treasure.
~Enter from the top left entrance. Now double jump will bring you to the right
side where the broken ladder is.
~Proceed to the right part of the map which you couldn't reach in the first
visit, go down to the bottom area to find the second warp point of the map.
~From the second warp point, go up and left. Then go to the top for the glyph
by using the magnetic fields. Once you reach there, you have to stick with
the magnetic field because the wind can blow your down. To absorb this glyph,
swing yourself to the right end of the floor without dropping and immediately
press UP to absorb the glyph, you should able to get this Pneuma glyph before
the wind blow you down at the left gap.
~After this, follow the path to left. While going up, you can find a secret
spot just below before the exit. Break the wall on the right to get a Ruby.
Location:
~Now use the save point in the next room.
~HIDDEN TREASURE: Above the save room, the other exit of the map is located at
right side. Before that, head to left and run down the mountain. Then go right
through the path below the mountain. Follow this path until the end, now crouch
in the end of the path to find the treasure, Emperor Ring.
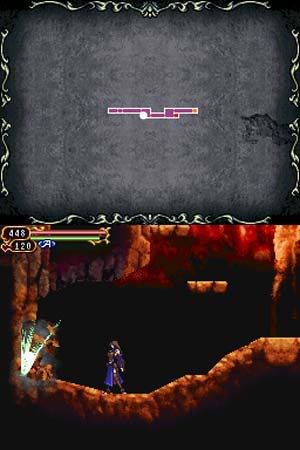
~Now move one more section to the left. You will find the Fire Demon at the
middle of the mountain. As you can see a glyph appears while the Fire Demon
start casting the fire spell. Once you see the glyph appears, absorb it before
it gone, which is the Ignis glyph.
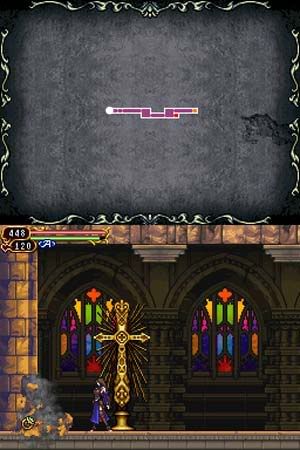
~After that, head to the exit on the right, save the villager, Marcel, before
leaving the place.
-------------------------------------------------------------------------------
-------------------------------------------------------------------------------
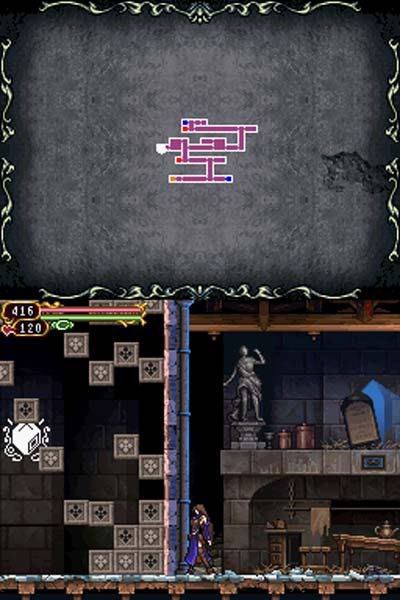
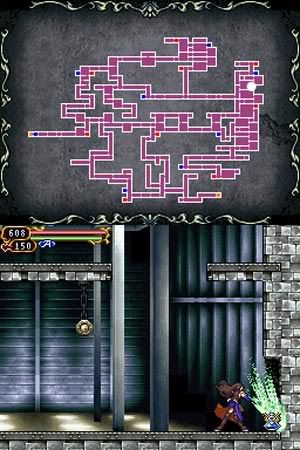
#= Monastery
~Not going for the next destination yet, there's somemore to explore here.
Make your way to the second floor where the first save room is.
~Right outside the save room, you can use those magnetic fields to reach to
the top, then go into the left section.
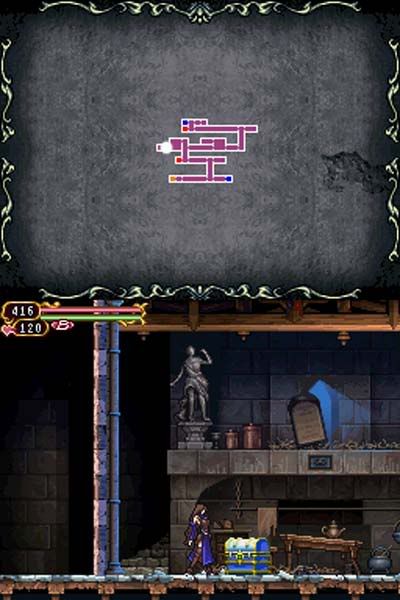
~Now you're able to take that chest in midair with double jump ability,
which is a Fool Ring.
~Continue to the next room at left where the lonely Bone Scimitar is.
Needless to say, defeat that Bone Scimitar first before anything.
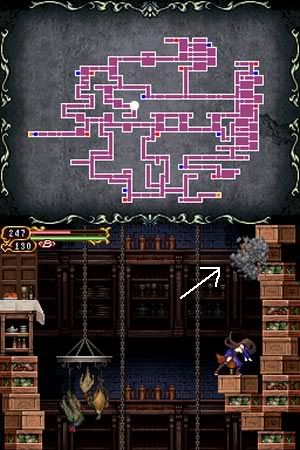
~Now tight to the left wall of the room, perhaps you have noticed those small
stones hidding a glyph early of the game. What you can do is destroy a large
amount of the stones in once and then absorb the glyph before the stones cover
the glyph again. And this is why I want you to get Ignis glyph before.
(If you missed the Ignis glyph, check the Tymeo Mountain section above here)
~Set Ignis into both of your glyph slots, perform a glyph union to the stones
wall and then absorb the Cubus glyph immediately.
Credit: tri-Ace Fanboy from GameFAQs mentions the Ignis + Ignis union.
Location:
~After this, if you have alot of time to spend, stay here abit longer to get
the Justice Ring from the hidden treasure as well.
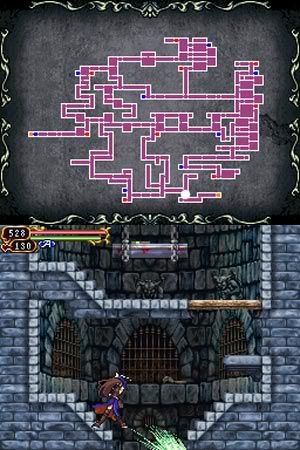
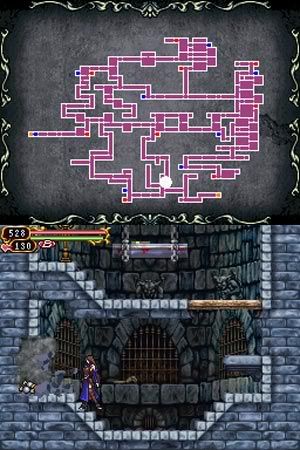
~HIDDEN TREASURE: What you can do for the Justice Ring is, keep destroying the
stones behind the wall again and again. Eventually the stones will stop falling
from the first line and so on. Remember your ranged glyph can always hit the
furthest stones. Keep on doing this until all the stones stopped falling and
the treasure will appear, which is the Justice Ring (Enemies killed increase
attack power).
Location:
~That's all for this place, you may go for your next objective now.
-------------------------------------------------------------------------------
-------------------------------------------------------------------------------
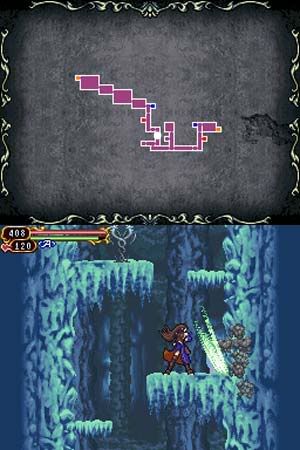
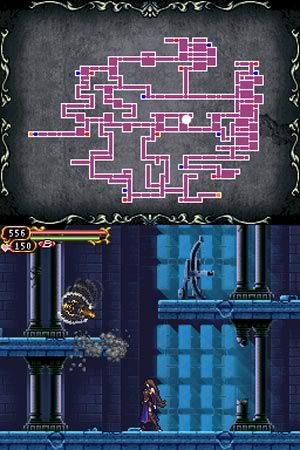
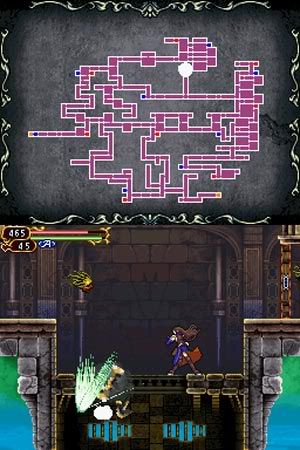
#= Tristis Pass
~Follow the path to left. Before go down the cliff, jump to the left to get
the first warp point.
~Search the right side in the middle of the cliff to find the save point.
~On the icicle passage on the bottom, you will encounter a Mimic, so prepared
to fight it before you open the treasure chest.
~Waterfall area, head up to the top level and you can find a Vol Grando glyph
over there. Use the magnetic field to swing yourself to the glyph and absorb
it immediately, you should able to obtain it before you're pushed away.
~Now the waterfall will be dissolved. Jump down and stick to the left part,
perform a midair jump to get the Heart Max Up treasure.
~At one level below the Heart Max Up chest, break the wall on the left to
enter the secret room. Save the villager Irina inside that room.
~HIDDEN TREASURE: Crouch in the middle of the waterfall. Obtain Lovers Ring.
~Back down to the bottom passage and head to the left. Make sure you check
the last room at left side after overcome the Armored Beast enemy, there's a
HP Max Up chest inside that room.
~Afterwards, follow the path leads to the icicle cliff. About the second level
of the cliff, the wall on the right is breakable, so break it and grab the
Onyx from the wall.
Location:
~At the next cliff can find another save point in the room at left.
~Proceed to the top, find the warp point on the right.
~Move left to the mountains area, check the path under the mountains for more
items if you like.
~The second mountain can find the Vol Hasta glyph. The fourth mountain can
find a Inire Pecunia and MP Max Up through the path below the mountain.
~Since you can find alot of Lizardmans here, try farm a Vol Scutum glyph
form this enemy.
-------------------------------------------------------------------------------
-------------------------------------------------------------------------------
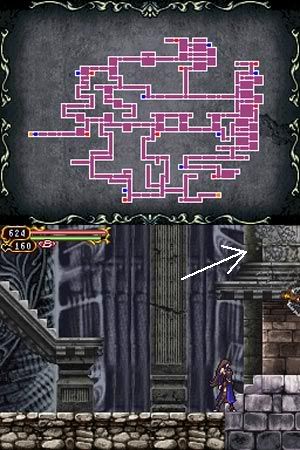
#= Oblivion Ridge
~Prepare your powerful combination to get pass the first area as fast as
you can to prevert from being surrended by Flea Man. Just jump over the
enemies like Werewolf and Lizardman.
~Next area can find the save room on the bottom right. There's a status
on the top left part of this area, to reach that part, stomp on an Altair
and perform a midair jump so you could get higher. To perform a stomp in
the midair, double jump and press DOWN + B buttons.
~Break the statue and absorb the Sapiens Fio. Now equip the Sapiens and
two Vol Grando glyphs for the next fight.
~BOSS: Gravedorcus (HP: 3600)
A block will be pushed from your standing place, prepare to jump away from its
fin attack from the back. After that, the boss will show at the opposite site
from where it does the fin attack, either the poison breath or toss out alot
of mines, dodge its mines and destroy all of them, by using Vol Grando glyph
is easier. The boss will repeat fin and poison/mines attack few times, but
basically use the block as your sheild should be enough to dodge these moves.
Later it will appear at one of the blocks and slash it away. Once both blocks
are destroyed, run to the side where the direction of the last block was
slashed and wait the boss at the end of the side, it will dash to you and
stupidly jump onto the, so slide under the boss once it jumps. Make more
Vol Grando attack before it's recover. After this move, the boss will start
over the fin and poison/mines attack again.
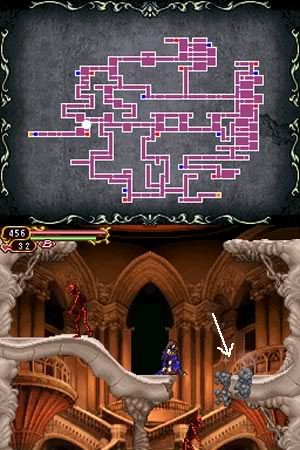
~Next area, there's a Chamomile on the top right part, you can stomp the
Stone Rose to reach there like how you did in the previous area before the
boss fight, but this is harder to be done.
~Before the next area, search the corner behind the Stone Rose and break it
for a Diamond.
Location:
~Afterwards, proceed to the left until the end of the map for a scene.
~Before you leave the last room, destroy the wall on the left for Hermit Ring.
Location:
-------------------------------------------------------------------------------
-------------------------------------------------------------------------------
#= Ecclesia
~Back to this place, head up to the room at top right. Speak with Barlowe.
-------------------------------------------------------------------------------
-------------------------------------------------------------------------------
#= Argila Swamp
~Just only a straight path here, cross it to reach next location.
-------------------------------------------------------------------------------
-------------------------------------------------------------------------------
#= Mystery Manor
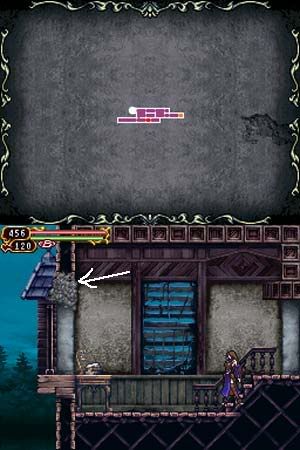
~Get pass the passage to the hall, enter the top right room to find 2000 Gold.
~Cross the middle passage to the left hall. Top left room contains 2000 Gold
as well, another thing is you can break the top left part of this room to
get a Schinitzel.
Location:
~Next, go down to the bottom. The left side is a dark room contains a glyph
which is Vol Umbra. You can have a try if you need it now. Or else, wait until
you get the Arma Machina late of the game then only you return to this place.
Additionally, by using Arma Machina to destroy all those spikes in the dark
room will unlock the Fortune Ring.
Check the Dark Room map here if you want to challenge it for now:
Dark Room Map
~Now move to the right to find the save room. Be ready for the next fight.
~BOSS: Albus (HP: 4000)
You might notice the Acerbatus glyph appearing from this boss in one of his
skills, and this is the only way to obtain the Acerbatus glyph. Needless to
say, if you want this glyph, you should absorb it before it gone and don't
kill the boss before you got the glyph. The better way is keep sliding to his
back so you can always keep a short distance with him, even for the rest of
the fight after you got the glyph as well, just wait until he does any move,
you will have good chance to hit him.
~Get the Dominus Agony glyph after the fight.
~Head back to Ecclesia.
-------------------------------------------------------------------------------
-------------------------------------------------------------------------------
#= Ecclesia
~First of all, make sure you have fully charged your hearts. Do remember in
the room at the very beginning of the game can find a heart panel.
~Save your game before enter the top right room for the next battle.
~BOSS: Barlowe (HP: 4000)
Pay attention to his spell book which is a sign of what he's gonna do in the
next move. The Globus (purple sphere) can be dodged with a short jump, that's
mean do not jump too high. Eletricity hit can be dodged with a double jump.
Once he lands on the ground, jump as his book touch the ground otherwise you
will be freezing until his next move. Another move is fireballs attack, you
must run, jump, and slide to dodge all of them. As the boss getting lower HP,
he will warp and attack from both side, double jump is the best way to dodge
this move. Recommend use ranged glyph for this fight. And you may get the
Globus glyph from the boss as well, likewise, absorb it when he show it.
-------------------------------------------------------------------------------
-------------------------------------------------------------------------------
#= Dracula's Castle - Nightmare Gate
~Enter the castle. Find the save room on the right. Find the Heart Max Up on
the opposite side of the save room, it's on the top left part.
~While going up the building, above the second Blood Skeleton can find a
Tasty Meat hiding in the edge.
Location:
~Top right leads to a treasure, but currently you couldn't get pass the wall,
so take the left path.
~HIDDEN TREASURE: The next room will face the Black Panthers and a Peeping Eye
enemies. Once you get rid of them, jump to the platform at top right corner
and crouch for the White Drops hidden chest.
~Follow the path until the next section.
-------------------------------------------------------------------------------
-------------------------------------------------------------------------------
#= Library - Bloody Tomes
~Move up until the room you see the Draculina enemy, find the HP Max Up at
top left corner of the room.
~In the hall before the boss arena can find the save room on the right and
warp point of the section on the left. Top left of the hall contains a chest
with MP Max Up.
~BOSS: Wallman (HP: 9999)
The way to defeat this boss is absorb his Paries glyph. The boss will throw
out some bombs and the explosion will damage all the straight lines extending
from the bombs. The chance to get his glyph is the moment before the bombs
explode, and do not expect you can absorb it on the ground, the location to
absorb his glyph is on the blue block that's near the boss. You must wait
for the turn when the bombs could not damage this point, and quickly jump
to the blue block and hold UP to absorb it as soon as it's available.
~Now you obtain the Paries glyph. Equip it and get through the wall with
shiny energy. Destroy the statue for Melio Confodere.
~Go down and take the left path from the branch.
~After the small room, you will encounter a Draculina at the top left and
3 Mad Butchers on the lower part of the area. The wall behind that Draculina
can be destroyed and inside there can find Refectio glyph and Hanged Man Ring.
~Continue to the lower area until you get passed the long dining hall with
2 annoying Tin Man enemies, you can find another secret spot. Find the convexy
crate above the Mad Butcher, break it for Cream Puff.
Location:
~Afterwards, go down to obtain the Dextro Custos glyph in the end of this
section. Then make you way back to the Nightmare Gate section.
-------------------------------------------------------------------------------
-------------------------------------------------------------------------------
#= Dracula's Castle - Nightmare Gate
~Proceed to the passage above the first save room of the section, head to left
and use the Paries glyph to get pass the energy wall. Take the HP Max Up chest.
~Go right from the branch to find a Valkyrie Greaves chest in the next hall.
After this, you should turn back to the branch and take the other path because
it's blocked you from getting further.
~Go downstairs will reach to the next section.
-------------------------------------------------------------------------------
-------------------------------------------------------------------------------
#= Underground Labyrinth - Flirting with Shadows
~Go down the long stairs, next area follow the path to left.
~In the next stairs, enter the room on the left and inside this room covered
by full of flames. In the end of the room contains the Vol Ignis.
~By the way, you should get the Nitesco glyph from the Nova Skeleton.
Additionally, try farm the Fidelis Polkir from the Polkir as well.
~Once you reach to the passage leading to the right, search the top right
part of the end of the passage to get a Mercury Boots.
~Next section, you can find a warp point at the mid of the stairs and a
save room on the bottom.
~BOSS: Blackmore (HP: 5000)
The left corner is the only place you can stay unless the boss has gone
backward. Dodge his melee hit and breath attack by jumping. Double jump
whenever his shadow raises its arm should be right. As for his shadow's
comets, you must judge by how the shadow blow out the comets, if its body
seems like moving back means the comets will drop in different spot which
about 1 Shanoe's body space between each comet, if its body didn't move
that move while blowing the comets indicates the comets will all fall on
the corner (the leftern spot). The recommended glyph for this fight is
Nitesco (from Nova Skeleton), if you have not obtained this glyph yet,
use other powerfully ranged glyph that you got.
~Proceed to the right side after the boss fight. In the next area, take the
right path from the branch instead of going up. In the following area, go up
to the end and inside the only room up there can find a Heart Max Up behind
the Red Smasher.
~Leave the room, go down to the bottom of the area and you will encounter a
Flea Man down there. Get rid of the Flea Man first, now perform Lizard Tail
(DOWN + B) slide several times to destroy the ground.
Location (the ground is already destroyed):
Or Video (start from Blackmore boss room):
~Jump down to the underground, move left to get a Super Potion. Move right and
use the Paries glyph to get pass the wall and obtain Felicem Fio. Jump and hit
the wall on the right to unblock another energy wall, use Paries again to get
pass the second wall to obtain Rapidus Fio, which is a very useful glyph! Other
than these, you can find another entrance of Dracule's Castle as well.
~After all, head back to the branch just now you passed. This time go abit up
and head to the left room.
~HIDDEN TREASURE: The room you could see the rock keep falling from the top.
The wall at the first corner is an energy wall, which means you can go inside
with Paries glyph on. Before that, the small space below the energy wall is
the hidden treasure spot. Crouch at that space to get the treasure, Star Ring.
~In the same room, use the Paries to get into the wall so you can avoid
the falling rocks. Reach to the top of the room and obtain the Lapiste glyph.
~Afterwards, go back to the branch you came just now, now head to top right.
~Next area, break the wall on the bottom left corner to get a White Drops.
Location:
~In the water room, you should push down the second block into the water then
only push the first block. If you have pushed the first block accidently, just
exit and re-enter this room and do it again.
~Continue to the top part of the next place will reach to the other section.
-------------------------------------------------------------------------------
-------------------------------------------------------------------------------
#= Barracks - Distant Memory
~Take the Melio Hasta glyph at the beginning. Save point is inside the room
on the right of this hall.
~HIDDEN TREASURE: Move on level above the save room and go to the right door
will get you to the outer area. There's the first encounter with Blade Master.
Now see the platform just above the door? Crouch on that platform to obtain
the hidden treasure, a Green Drops. Besides, you can find another treasure
and 2000G in the end of this area.
~Back to previous area and go up, explore the top left room for Heart Max Up.
~Get pass the passage leading to the right, there's a secret room behind at
top right which is behind the Lizardman Blade, break the wall to enter this
room to obtain a HP Max Up.
~Same area where you encounter the first Lizardman Blade, another secret spot
is right at the edge of the stairs to the right. Break it for a Green Drops.
Location:
~Move down to reach the lower part, you can find an MP Max Up at bottom left.
~HIDDEN TREASURE: Next area, will be an outer area. The first part of the
passage will encounter some Blade Masters and the second area will face a
Lizardman Blade. The treasure is in the second area where the Lizardman Blade
is. Crouch on the platform of the left side to find it, which is a Red Drops.
~Next building, take the right path first and you should able to find the warp
point of the section. Beside this, check the bottom room for Valkyrie Mail.
~Move up to next floor, break the top left wall to open up the secret room
contains a treasure chest with Moon Ring.
-------------------------------------------------------------------------------
-------------------------------------------------------------------------------
#= Mechanical Tower - Styx Passage
~First of all, destroy the statue around the right side and absorb the Vis Fio
glyph. A save room is located in the top left room. For now, take the middle
left path to advance.
~When you reach to a bigger room, take the lower right door instead of lower
left. Use the magnetic fields on the two wheels with Magnes or Rapidus Fio
glyph to get pass the spikes.
~Next area encounter an Automaton ZX27. Try farm an Arma Machina from it.
After that, take the exit at the bottom. Beat the next passage with 2 more
Automaton ZX27 to reach to the last room.
~Now what you need to do in the last room is hit both switches with an
electricity attack together. Personally, I use Glyph Unions of Melio Hasta
and Vol Fulgur, double jump and hit the top switch and then following with
the bottom switch as soon as I land on the ground.
Video:
~Obtain Morbus glyph.
~After this, return to outer area and then go to the lower area from the
left part of this section.
-------------------------------------------------------------------------------
-------------------------------------------------------------------------------
#= Arms Depot - Cry in the Night
~Once you reach this section, go all the way to left until the end. The wall
at the end can be destroy. What's hiding inside this room is a HP Max Up.
~Do down and enter the room on the right. Beware of the Spectar Sword, do not
let it stay too close to you. In the end of this path can find the Melio Scutum
glyph from the statue.
~Follow the path to left, obtain Melio Culter and then Melio Falcis glyphs from
the statue as well.
~The warp point of this section can be found in the first stairs area, and it
in the left room.
~Go until the next stairs area, check the left room to find the save room.
~The small platform just in front of the boss room gate is breakable spot.
Break it the obtain a Mint Sundae.
Location:
~Enter the room after the boss arena and get the Arma Custos glyph.
~Back to the left, take the warp point to Barracks section. From there,
go up and then right to the Mechanical Tower.
-------------------------------------------------------------------------------
-------------------------------------------------------------------------------
#= Mechanical Tower - Styx Passage
~This time, take the upper path.
~Overcome the passage with an Automaton ZX27, encounter 2 Lizardmans and
unlimited Medusa Head and Gorgon Head. Beware of the gold Medusa Head and
Gorgon Head (gray) which can inflict Stone when touched.
~In the next room, you should use the Magnes glyph to get pass the spikes.
Make sure you search for the upper part of this area to find the Valkyrie Mask.
~Next area leads to top.
~Following room, break the wall at the right end can find a HP Max Up.
Location:
~Still in the same room, find the chest at mid left of the area which contains
a Heart Cuirass. Afterwards, take the top right door.
~Next section, you will face tons of Medusa, Gorgon Heads especially the
top area. Get pass them to the next room, overcome the Bugbears and reach
to the last room. You will get the Death Ring from the treasure chest.
~Return to the room where Heart Cuirass was, and take the top left door.
~Move to the upper area, then go to the right can find the warp point as well
as the save room on the right before the boss room.
~BOSS: Death (HP: 4444)
First of all, make sure your Heart is full. Equip everything that boost your
attack and strength, We are going to end this as soon as possible, so equip
the Death Ring as well. For glyph, you can try Melio Falcis, Nitesco, and
Vis Fio. Enter the battle, activate the Vis Fio and then blast him with
Glyph Unions of Melio Falcis and Nitesco. This fight could be end before
you run out of Heart.
~Enter the room behind the boss arena and get the Sinestro Custos glyph.
~Now back to lower area, take the left path from the branch at the cliff.
~Follow the passage to the left and you will find the cerberus lock.
Step on the button with all Custos glyphs equiped to open the lock.
~Reach to the cerberus statue, use the Custos glyphs to light up the statue.
~Go straight up to the top, enter the left room to find the save point.
The edge of the platform just before the save room can be destroyed, so
destroy it to get an Eisbein.
Location:
~Head to the right area.
-------------------------------------------------------------------------------
-------------------------------------------------------------------------------
#= Final Approach - Dust to Dust
~Follow the only path to upper area. From the room you encounter some
Cave Trolls, proceed to the door that leads to left (for some extra stuffs).
~Overcome the Lilith and Final Knights, you will come to a large empty hall
with unlimited Winged Skeletons. In this area, you can find a MP Max Up,
a random treasure chest, and the Volaticus which is the glyph allows you
to fly.
~Now use the Volaticus glyph to fly to the top of current place, the Sun Ring,
Blue Drops, MP Max Up, Heart Max Up are in the chests up there.
~After all, back to the place you came. Take the top right path to advance.
~Proceed to the room with a Blade Master and Bugbear near the entrance,
break the wall right on top of the entrance to find the Judgement Ring.
Top right find the warp point and bottom left find the Heart Max Up chest.
Location:
~In the same area, use Volaticus glyph to fly up to the ceiling and break it.
You can obtain Onyx, World Ring, Diamond, Gold Ore on the rooftop.
Location:
~Now head to top left, after the small empty room, you will need the Paries
glyph again to obtain the MP Max Up and Super Potion on the bottom area.
~Next room will be the save room before the final boss. Since there's a
warp point around here, lets back to certain locations to discover the
remaining secrets that have not been mentioned in the walkthrough yet.
Of cause you can enter the final battle anytime if you are not interested.
-------------------------------------------------------------------------------
-------------------------------------------------------------------------------
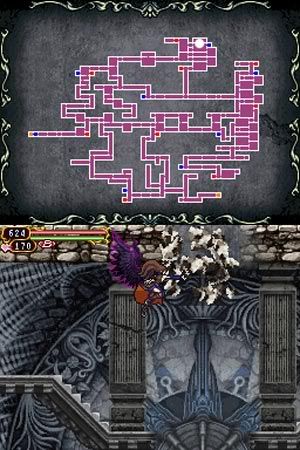
#= Tymeo Mountains
~Back to Tymeo Mountains. Make your way to the cliff in the center of the map,
where you can find the Rock Knights and Yeti on the suspension bridge. Check
the left room at the middle of the cliff, and there's a shiny wall leads to
a Devil Ring, activate Paries glyph to pass the wall.
Location:
#= Misty Forest Road
~Back to Misty Forest Road from the left entrance. In the second area, you can
find an shiny wall. Activate Paries glyph to get pass the wall.
Location:
~Obtain Melio Arcus from the statue, then Hierophant Ring in the chest.
Before you leave, destroy the wall in the end for a White Drops.
Location:
#= Mystery Manor
~Back to Mystery Manor and proceed to the left room. As mentioned before the
Vol Umbra is inside this dark room. If you haven't gotten it yet, you can now
activate the Arma Machina glyph to help.
~HIDDEN TREASURE: Use the Arma Machina to break down all the moving spikes to
unlock the treasure, which is a Fortune Ring.
#= Wygol Village
If you have followed the walkthrough, you will definitely have saved all
villagers in the game. Find them in Wygol Village and they will give you some
side quests which I never mentioned in the walkthrough. Please check this section for more details of each quest from the villagers.
-------------------------------------------------------------------------------
-------------------------------------------------------------------------------
#= Dracula's Castle
~Enter from the left entrance, use the warp point to where we left off,
the Final Approach - Dust to Dust section.
~Make your way to left where the final save room is. Save your game before
the final boss.
~Final preparations
I would like to use the suicide trick like how we fought Death, because we
should end it immediately before things are getting nasty. Make sure you have
enough items to heal your full HP for safety. Besides, make sure you heart bar
is full (or at least 120 hearts).
Equip Death Ring and Judgement Ring, as well as other equipments that boost
your attack power. For glyph, use Melio Falcis, Nitesco, and Dominus Agony.
When Dominus Agony is on, you could deal over 1000 damage with Glyph Union.
~BOSS: Dracula (HP: 9999)
Enter the room, once the battle begins, move closer to the boss and activate
the Dominus Agony and slash the boss with Glyph Unions of Melio Falcis and
Nitesco. His first move probably will be shooting the little fireballs, and
which be destroy by your Glyph Union, so ignore it and keep slashing with as
much as possible. Depending on your level, if each of your Glyph Union hit
deals over 1500 damage, this battle will end before the boss finish the first
move, yes just in a few seconds.
Incase if you could not finish him yet, his next move probably will be walking
to you and kick, assuming your HP is very low now since Dominus Agony reducing
your HP, so heal your HP with items now. Move abit further when the boss
getting closer with you, hit him with a few more Glyph Union attacks to end
him. After a short event, you must use the Glyph Union of Dominus Anger and
Dominus Hatred to end the fight.
That's all for the story. Congratulation!! Enjoy the ending!!
Back to Part 1
Back to Content Menu
27 comments:
how to pass the boss lv
SPOILER!
If you stand under his arms, he will either stab downward or drop to fire arrows. When he stabs back away. When he fires arrows, attack the crossbow, you can deflect the arrows. Repeat until the crossbow is destroyed then begin attacking his front knees. When the jewels break, he will kick up. Run under and wait for him to jump at which point you run to his rear. Begin attacking his rear knees avoiding the occasional kick and tail stab, both are easy to spot. When he drops, again, destroy the crossbow. Finally, drop him once more and climb onto his back. Begin attacking the eye. He does three methods of attack: tail stab (duck in the middle), elbow (stay to the left), and sword sweep (as far to the right without getting hit). Continue until he dies. If you fall off just repeat the process to get to his back. Good luck!
This is for those wishing to take this boss down while trying to earn his medal. Follow the steps as anonymous has pointed out. But to score big dmg on this guy use Melio Macir on both hands paired up with Vis Fio for an extra boost in damage.(note: its also good if you have your Mace kills built up a bit for a even bigger boost of damage). For rings use the death ring along with the moon ring for a massive stat boost.(note: wearing the death ring is a instant kill on you if you get hit, but if your trying to get the medal it won't make much differance). Last but not least equip armor that boosts your Str ex. the barbarian gear is pretty well heavy in the Str area. Have around 170 Hearts for this fight because by the time you get to this guy's head you will want to burn all of your combination attacks. Hope this helps and good luck.
Hey guys/girls, thanks for sharing your experience. Yes this helps alot, this is quite an advance tactic here.
dude when will u put the rest of the walkthrough i got some good tips so far.wenever im stuck i consult it.thanks.
This is an awesome guide.thanks a lot for all the info.By the way guys,any advice on how to make easy money? I remember I saw certain video somewhere else that indicates an easy trick to be done aT Timeo mountains but I forgot it.
Hey man, thanks for creating this walkthrough. I've just reached Dracula's Castle.
I would also like to know how to get easy money, I have a ring where it can temporary increase coins from defeated enemies but still haven't really use that yet.
Can't wait the new updates.
Thanks for posting.
For the easy money trick, find the LEFT warp point of Tymeo Mountains, there's a torch just outside of the warp room, jump and stomp on that torch will spring you to the upper screen, do the same thing again when the screen change. So that torch will appear again and again. Needless to say you must get the Gold Ring x2 (rare chest in Kalidus Channel) and Inire Percunia (in Tristis Pass) to boost up the golds drop from the torch.
I think the video you mention is here:
http://www.youtube.com/watch?v=adRI6OBe3uI
Hope this helps
Hey, thanks for the tip, I managed to get $300,000 in just a few minutes! :)
Another question, how can I easily farm glyphs from enemies? Is there any accesories or items I can use to increase the probability for the glyphs to appear?
So far what I know, there's nothing can increase the probabillity for glyph appearance. Good luck :)
greta news...thanks a lot!
Just got the Glypj you mentioned...now is a matter of getting those gold rings...a rare chest on Tymeo Mountains?...any hint guys?
never mind he he!
I use the lucky pin or wathever you call it the one that costs 777 @ the estore and I keep killing enemies of the same kind of the glyph I want to obtain...that's how I do it.
You mean Lucky Clover right? I have those equiped but still not able to absorb some of the glyphs like the 'flying sword' enemy in dracula's castle....
Hmm just a thought from your ideas, what about Fortune Ring? (Obtain by destroying all the spikes in the Dark Room of Mystery Manor)
Since it raises Luck based on your playtime, so keep your NDS overnight or something to make your playtime longer.
More info, someone from GameFAQs mentioned each Luck point increases 0.5% chance of the drop rate.
Can someone please tell me where the villager between Serger ans Monica is located
Anna? read the villager location there
http://sephirosuy.blogspot.com/2008/10/castlevania-ecclesia-villager-locations.html
Very very good tutorial... and this game is really really good ! so glad i bought this.. ( i wasn't sure at first ... but gosh... been spending nights playing and only getting few sleep for next day work ;))
Thanx again, the tutorial helped when i got to dracula's castle.
How do I get Irina, after the waterfall had melted, I cant climbed the steps up anymore. Can anyone help me
Antoine, you can still climb the cliff edges at the tristas pass water fall after it has melted.
The way i did it was stand inbetween the water fall and the ledges. With shanoa facing the water fall , jump and and you should be able to do a double jump and land on the ledge you want.
Just repeat until you reach the top ^^
Btw sephirosuy , great guide its helped me alot :)
There is another way to get the Cubus Glyph is by using (Vol) luminatio and (Vol) Umbra then absorb it fast.
P.S. This Union uses 50 hearts
Great resource but there are no hints for the Large Cavern or Training Hall. I have spent the past day trying to defeat Jai Sheng but can't find the right combo of weapons/equip.
Also still haven't found the gold ring x2 yet.
Well, for Dracula, Jiang Shi and any other boss after you get Dominus Agony, I just use the Light and Darkness Glyph Union tactic. It's a bit cheap, and it's more fun to fight them normally, but it works. Just pop on a death ring (or two if you have them), equip Acerbatus, Vol Luminatio and Dominus Agony. Use the Union over and over - if you run out of hearts, use Milk and/or Heart Restores to get more. Each hit does about 1800 damage if your level is fair.
However, for Dracula, I begin by equipping any death rings I have, Volaticus and two Vol Luminatios. Fly at head height to hit him when he appears with two shots, then fly a bit above his head, then repeating. As long as you are flying at head height, and do not get too close before he begins to attack (if you get too close he will use a short range melee attack), he will only ever use the flames-up-from-floor attack, which is easily bypassed by flying towards and over him at top speed when he uses it.
Once you have dealt a certain amount of damage, and he turns sideways, use the aforementioned Union tactic until he talks to you - then simply use the Dominus Strike before he kills you with his Uber-Blast. This tactic also gets you the Dracula Medal.
For Jiang-Shi, just use the Union tactic. Be careful not to hit him afterwards as he stands still, or he will come alive again!
P.S. To get Cubus/Justice Ring easily, stand next to the wall and use globus over and over again. Should only take a little while.
Hope I helped!
Ecclesia FTW!
After beating Albus I went to talk to Barlowe and got stuck in the room. He keeps saying something and I'm unable to leave the room. Am I supposed to break the red flashing statue and if so how? I've been unable to find what to do in any walkthroughs!
Thanks!
Pneuma Gylph is too dificult to take. I wanna to suggest this video tutorial to help other users that have the same problem i have.
http://www.youtube.com/watch?v=yJYwFWS9I2s
sephirosuy, thanks for the killer guide, it's been a huge help. My two sons (7 and 9 years) have been playing and your tips have proven invaluable when they've gotten stuck. Both are ripping through Albus Mode now, thanks to you.
I've started playing myself, nearly through on normal mode, and I'd also like to see a decent guide for the Large Cavern and Training Hall... There doesn't seem to be anything about them on the web.
(btw - for those after Gold Ring, it appears in the rare chest on the sunken ship in Kalidus Channel, where you find the mouse. Sometimes it will just be a normal chest, so finding two can require several visits. Well worth it, because with two Gold Rings and Inire Pecunia active, you'll get $1000 every time. Using the bounce trick on Tymeo Mountains, I grabbed about three million gold in one sitting.)
Adam, you got the uhh "bad" ending because you have not yet rescues all the villagers yet (there are like 11 in all) althou you may have worked this out since.
Even if a really long time has passed since the last comment, this site remains extremely useful.
Just my 0.02$ when fighting Dracula without using any super-combo skill.
Equip Melio Falcis and Vol Luminato.
• When Dracula launches fireballs, get close enough to him, crouch, and destroy the fireballs; you won't hit Dracula but you should also take no damage.
Don't try to jump over him because he'll toss you away with his cloak, and if you dare to fly, Dracula will instantly use Fire Pillars which hit you twice and deal a lot of damage!
• When he uses Dark Infernal, get away from him, jump & dodge
• When Dracula uses the D.Hatred, get close to him and crouch: then quick hit him with your scythe or with a combo-attack.
• After you have hit him several times, he'll start using melee attacks.
•• A "crescent moon" kick - just stay away and attack as soon as he finishes
•• When he fades between the attacks, make sure to rear-jump and do a second forward jump, he could attempt the Soul Steal which does 80HP x3~x5 times, healing him for the same points you lose.
• Another attack is to summon some black panthers which simply run all over the room. Very annoying but they should go down with 1 hit from your scythe.
• Often used with the previous attack, Dracula will launch some purple beams, which will fall from the roof on your position. Keep moving to dodge them, but try not to slide since you'll eventually stop becoming an easy target.
• An extremely dangerous attack is when he summons a stream of bats, you must be quick to crouch and timely slide closer to him: it's hard because the bats stream is not steady, so you can still be hit even if you place yourself 2 inches further... beware that each bat deals ~100HP, but you can take multiple hits and lose all your HP in no time!
Post a Comment